After creating your first store, you will need to create a campaign.
A campaign is your way of presenting your affiliate program to potential partners.
To create your first campaign, follow these steps:
Campaign Definition
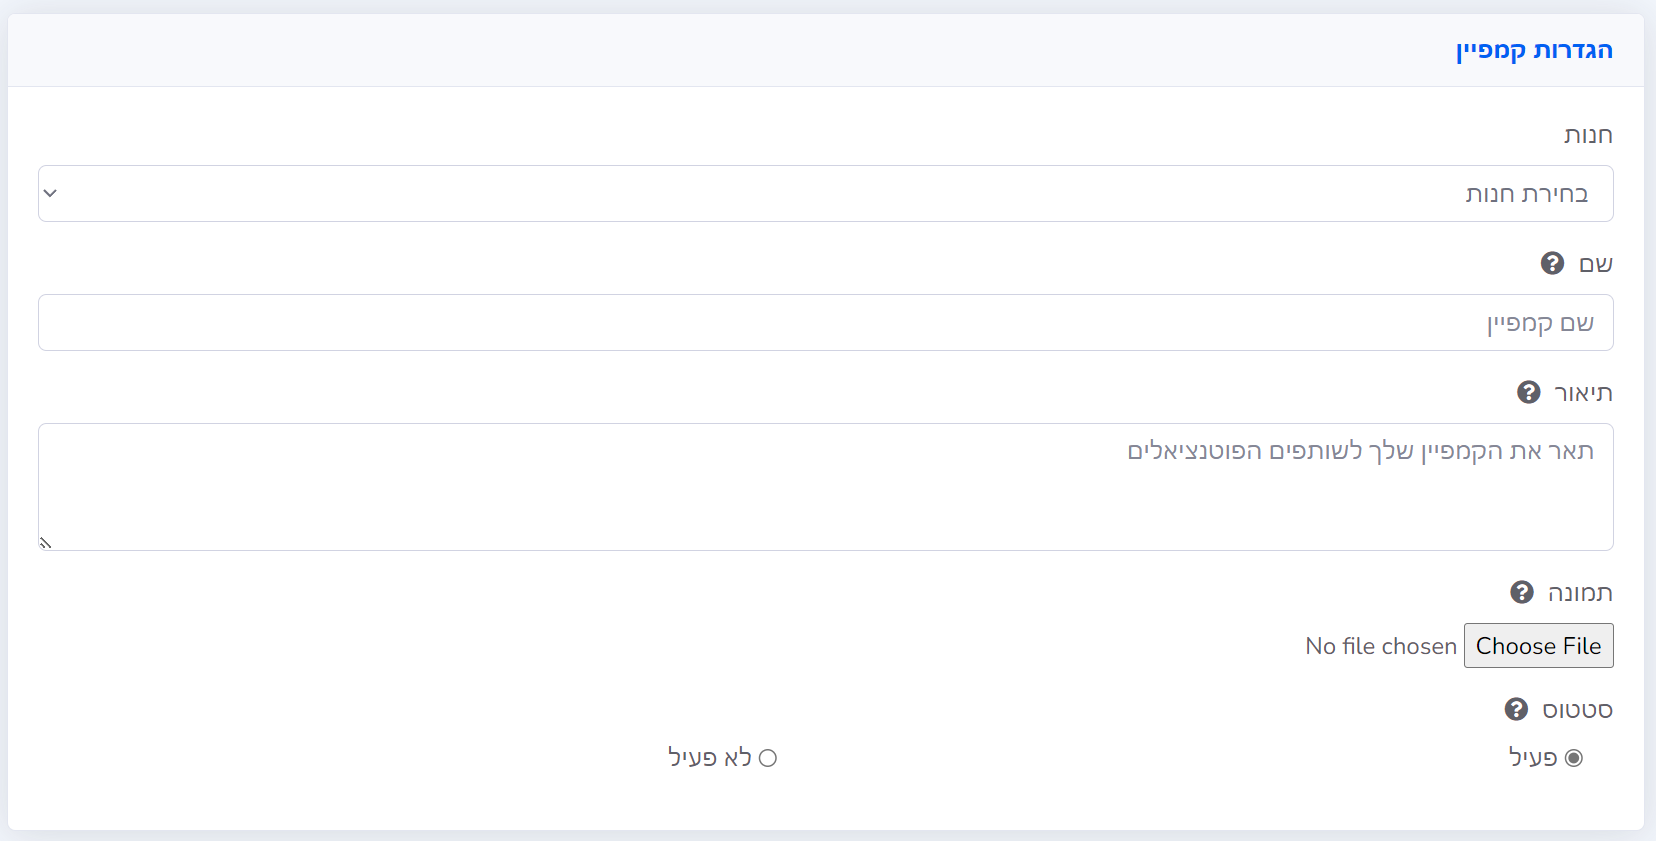
Store |
Select your store from the list of stores to which you will associate the campaign. |
Name |
The campaign name will appear in the list of marketing campaigns. If you have only one campaign, you can name it after the store. If you are creating a dedicated campaign, you can give it a specific name. |
Description |
This description will appear alongside the campaign name. Use it to detail your store, products, and reasons why partners should choose your campaign for promotion. |
Image |
This campaign image will be displayed with the campaign name and description. It can be a product image or a promotion relevant to the campaign. If you don't choose an image, the store's logo will be displayed to partners instead. |
Status |
Select Active if you want to launch the campaign immediately, or Inactive if you plan to launch it at a later stage. |
Settings and Payments
You can choose from 3 compensation options:
Pay Per Purchase (CPA)
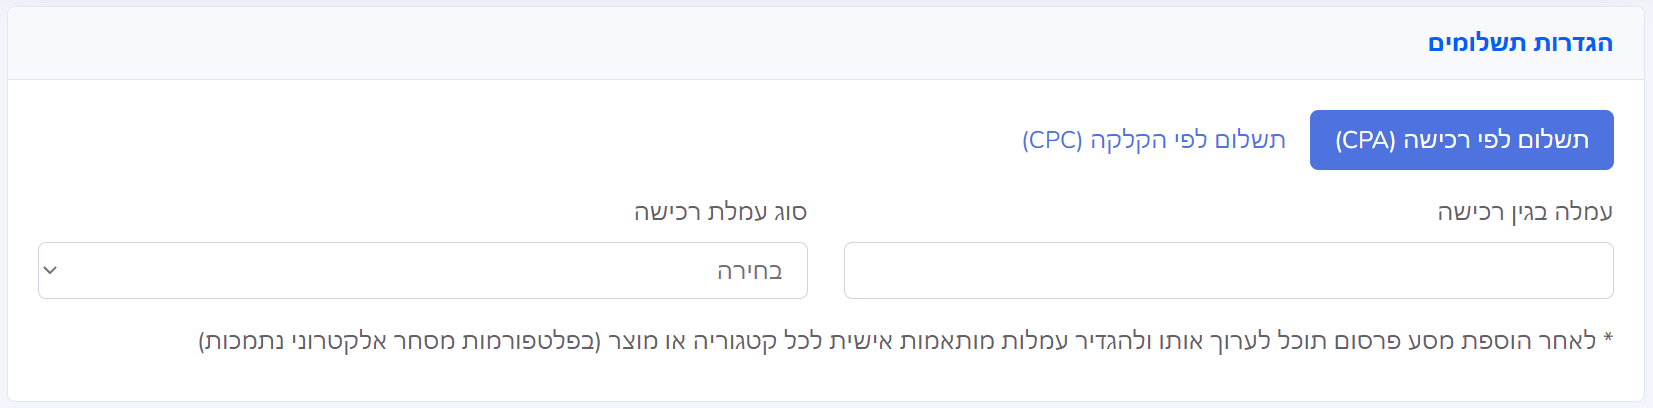
In Pay Per Purchase, you can set either a fixed commission (e.g., 25 NIS per sale) or a percentage commission (e.g., 15% of the purchase).
After initially adding the campaign, you can edit it to update specific commissions by product or category if your store supports this.
Pay Per Lead (CPL)
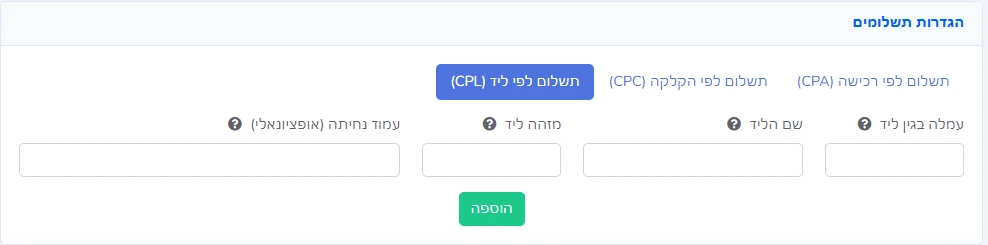
In Pay Per Lead, you can set a fixed commission (e.g., 25 NIS per lead) paid for contact information submission rather than a purchase.
For a detailed guide on creating a lead-based campaign, visit the Lead Campaign (CPL) Creation Guide.
Pay Per Click (CPC)

The Pay Per Click (CPC) model rewards partners for site visits. You must set the price per click in cents/pennies or full currency units, along with a monthly budget.
Marketing Materials
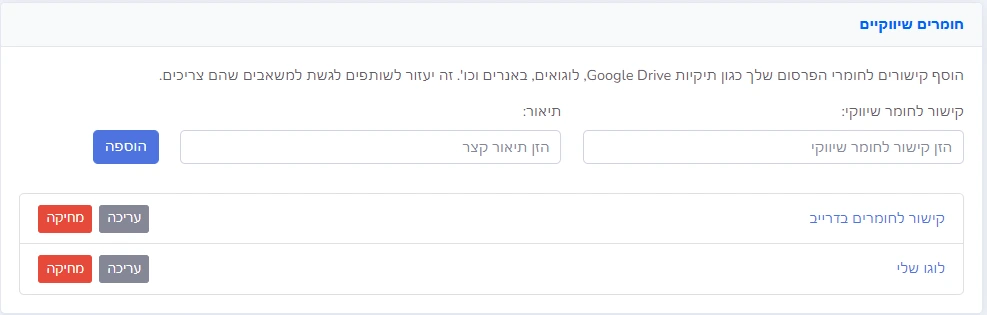
To ensure effective collaboration with your partners, it is recommended to add marketing materials to the campaign. You can upload links to a shared folder containing all necessary resources, such as logos, banners, and additional graphics. This allows partners to easily access and utilize materials to promote your brand and products. Sharing these resources not only provides convenience but also helps maintain brand consistency and strengthens the marketing impact of your campaign. Materials can be added during campaign creation and updated later.
Scheduling Settings
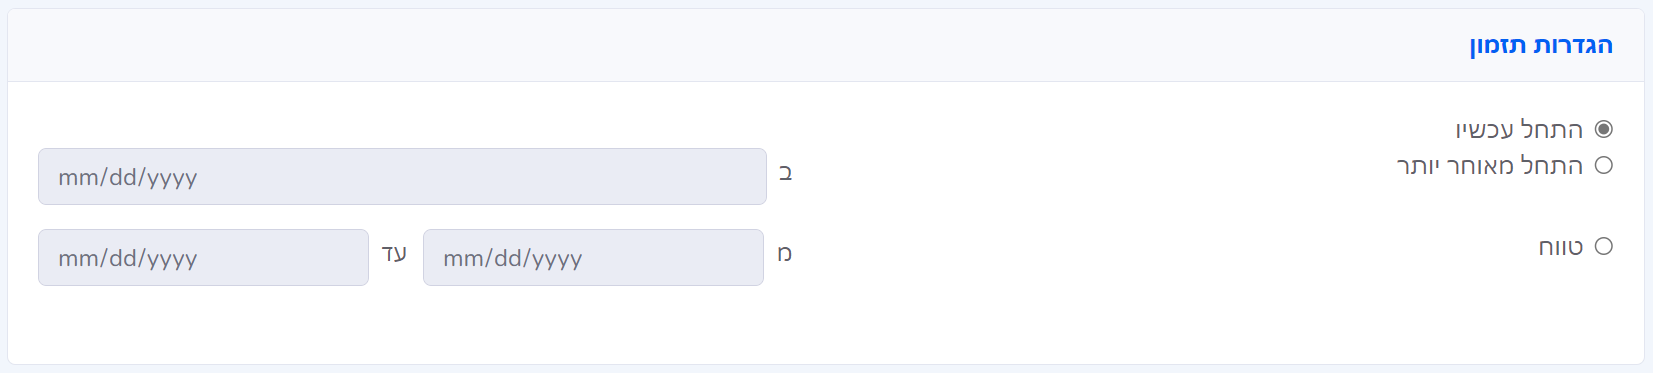
In the scheduling settings, you can determine:
- That the campaign starts immediately
- That the campaign starts on a specific date (at midnight)
- That the campaign operates within a date range (from midnight until 23:59)
Partner Settings
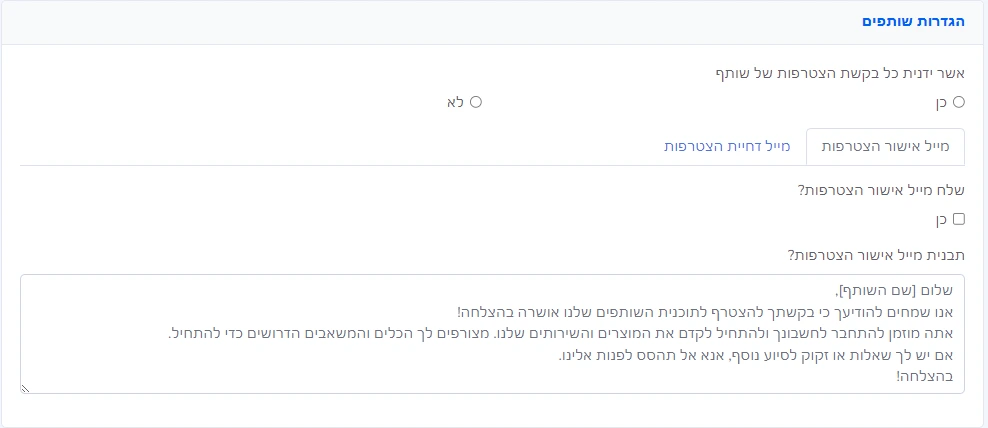
Manually approve each partner join request
This setting determines if partners can join your campaign automatically.
Check Yes if you want to manually approve each partner's joining, or No if you want to accept every partner into the system automatically.
Once a partner is approved for your campaign, they can begin promoting it.
Approval or Rejection Email
You can set an email to be sent to partners after their request to promote the campaign is approved or rejected.
Check "Yes" to send the email, and you can define a specific message to be sent for each case.
Terms and Prohibitions
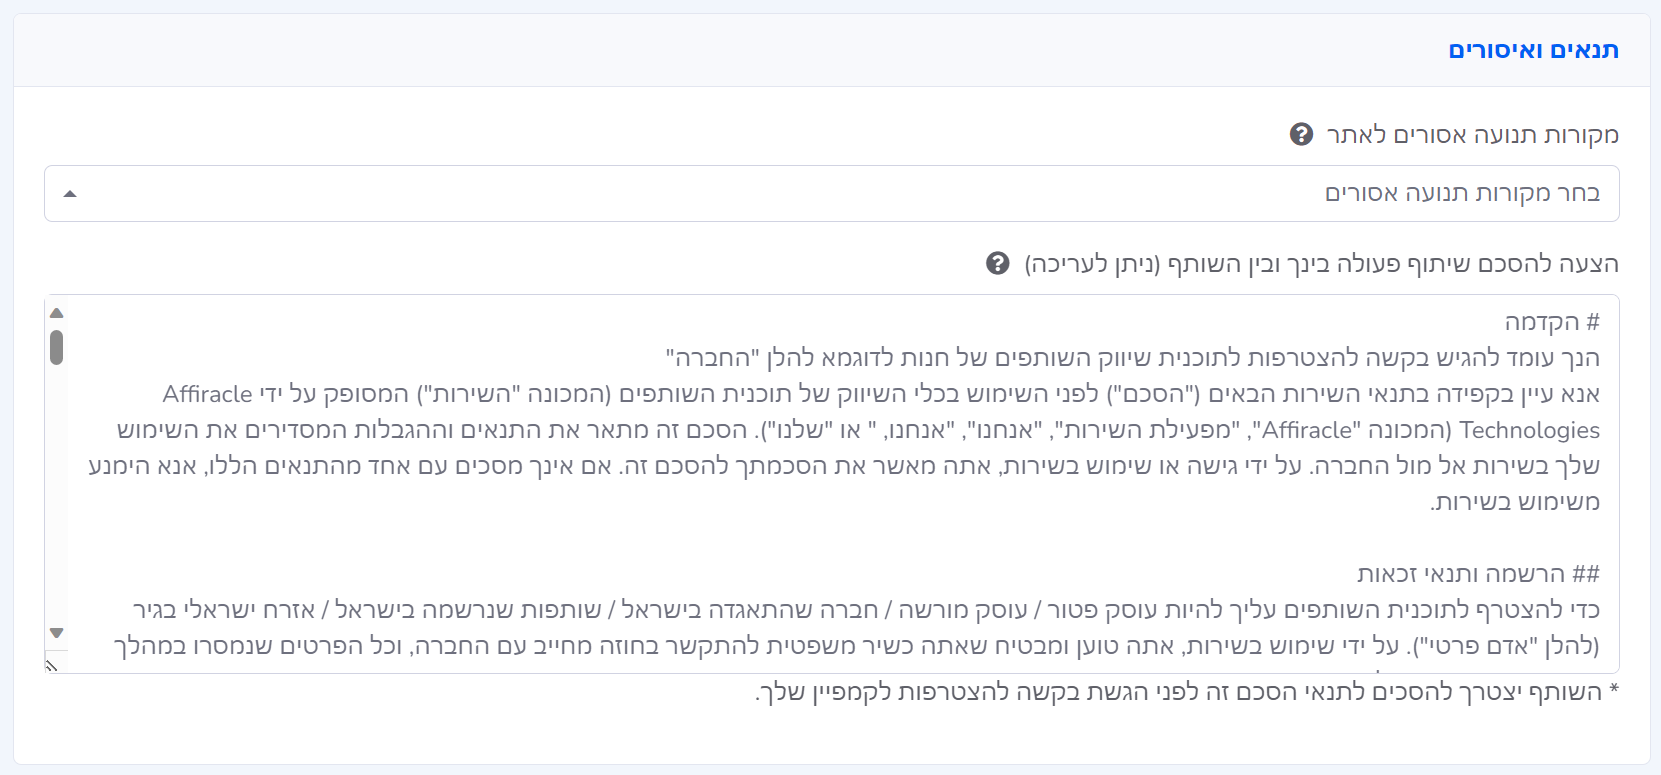
In the final step of setting up the campaign, you can define terms and prohibitions for campaign promoters.
You can choose from a list of possible restrictions to limit how partners promote your campaign.
Additionally, you can create or use the built-in agreement offered between you and the partners.
Completion
After selecting and filling in all the details in the campaign creation form, click Add Campaign to save it.
You can make changes after creating the campaign by editing it in your Campaigns interface.